


IP Office with Voicemail Pro - System Administration
______________________________________________________________________
CONTENTS
______________________________________________________________________
BASIC TASKS
Logging on and off system
A. IP OFFICE
LOG-ON:
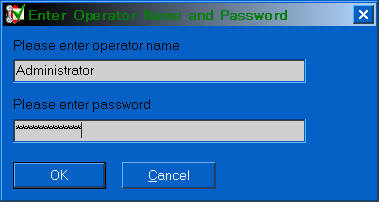
operator name: Administrator
password: Administrator
password (default) = password
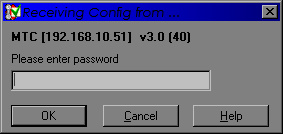
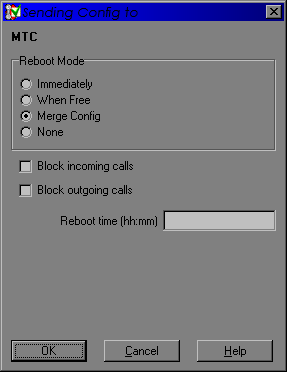
LOG-OFF: Save Changes: Anytime a change is made, you must "merge" the configuration:
B. VOICEMAIL PRO
1) Run the Voicemail Pro Client application (Start/Program Files/IP Office/)
2) Auto-attendants will be displayed on the lower left corner in "Modules"
3) After making changes, you must click "Save and Make Live" to enact changes
4) For more information, refer to the Voicemail Pro document: Files\Voicemail\Voicemail Pro Installation.pdf
5) For example call flows that detail customization to Voicemail Pro, see this document: Files\Voicemail\Voicemail Pro Example Exercises.pdf
Backing Up The System
A. IP OFFICE:
1) System automatically backs-up to the default working directory – Program Files/Avaya/IP Office/Manager – early every morning if any changes were made the prior day
2) From the Manager application (system configuration must be active on your screen) – File/Save As – specify location and file name (e.g., "phonesystem9_18_04.cfg) – file will be of type ".cfg"
B. VOICEMAIL PRO:
1) From the Voicemail Pro Client application – File/Import-Export/name file
2) Choose file extension of .mdb (entire database) or .mod (specific modules) when naming backup file
3) To backup all recordings, messages, names, greetings, etc., manually backup the default file location of Program Files/Avaya/IP Office/Voicemail Pro
Power-up Sequence
If requested to physically reboot the IP Office modules, it is important to follow a specific order:
Power down: Make sure that the main processor (determined by the existence of LAN ports) is powered off first, followed by the expansion modules.
Power up: First apply power to all expansion modules before powering on the main processor module.
** If all modules are connected to the same UPS or power strip, it is sufficient to power down/up JUST the UPS/power strip
Swapping Extensions
A. Determine Extension Numbers
1) Read the display on the phones
-or-
2) From the Manager application (system configuration must be active on your screen), look at the appropriate users to determine extension number
B. Change Extension Numbers via Software (manager)
1) From the Manager application, go to the Extension list
2) Sort extensions by the Extension column
3) Find the first extension to be changed. Double click, and renumber the Extension to match the Extension ID. Say OK.
4) Find the second extension to be changed. Double click, and renumber the Extension to the desired, new extension number.
5) Return to the first extension number that was changed (which should match the Extension ID after the change in step 3) and renumber this extension to the proper extension number
6) Re-label patch panel with updated Extension #’s or Extension ID’s
7) Swap the paper labels between phones, if appropriate
C. Change Extension Numbers via Hardware (patch panel)
1) From the Manager application, go to the Extension list
2) Sort extensions by the Extension column
3) Locate each extension number that is to change, and write down the matching Extension ID for each
4) At the patch panel, locate the appropriate Extension ID’s
5) Swap patch cords at the patch panel
6) Re-label patch panel with updated Extension ID’s
Add a Phone
Extension ID’s must be wired to a jack before a phone can be activated (in other words, when the phone is plugged into the desired jack, you must have a display on the phone to proceed with the below instructions)
At the phone to be added, read display and note the extension number. It is likely that the phone will display "NoUser" along with the extension number
Log into Manager, and pull the system configuration.
a. Go to Extensions, locate the extension number displayed during step 2
b. Open that extension (double-click), and change the extension number to the desired new extension number
c. Go to Users, and right click on the right side and select add
d. Insert User Name, Extension number and Full Name
e. Go to the Voicemail tab and enable Voicemail
f. In the voicemail tab, also enter email address if using TTS, IMS or voicemail email
g. Go to the Digital Telephony tab, and program buttons. Refer to existing users for example
h. Add user to appropriate Hunt Groups
i. Create a Direct to Voicemail shortcode for the user (in Short Codes), such as:
i. Short Code: *259
ii. Telephone Number: "#MikeJ" where MikeJ = the new user name
iii. Line: 0
iv. Feature: Voicemail Collect
Merge configuration. Some versions of IP Office may require a full system reboot
most changes require a Full reboot!
System Date and Time
The system date and time are received from the Voicemail Pro server PC and is displayed to all system phones and played back in all voicemail messages. Therefore, if the time is incorrect on the phones or on message time stamps, check the settings on the Voicemail Pro server PC.
Speed Dials
System wide speed dials are configured as system "short codes"
Open Manager and receive the system configuration
In Short Codes, right click in the right panel and select add.
Short Code will equal the actual speed dial, such as #600
Telephone number is the number to be dialed by the system. A "9" is not required.
Feature selected should be dial
Continue to add speed dials as needed.
Merge configuration
System Password
The system password is set in the Manager program. Under System<PBX name> and the System Tab.
Dial Delay Time (time delay between digits)
Manager - System Tab/Telephony – Dial Delay Time
Default is 4000 – system will wait 4 seconds after the last digit is dialed before placing the call
If dialing is taking to long or is too slow for users, you may change this figure to a lower number.
Default Allocated Answer Interval (time before voicemail answers)
Manager - System Tab/Telephony – Default Allocated Answer Interval
This is the number in seconds before voicemail answers.
This option also appears in User settings. If set specifically for a user, the user setting will override this user setting.
Maximum Voicemail Message Length
Voicemail Pro Client – Administrative/Preferences > General – change Max. Message Time (secs.)
User Name Changes
Use if a new employee comes aboard, or if someone gets married and changes their name
Changes to the names will require that the user setup a different (new) voicemail box. Messages CAN be imported via the Windows directory, if required.
Open Manager and receive the system configuration
In Users, there are 2 name entries: User Name and Full Name
a. User Name – must be first name and last initial – NO SPACES, NO NUMBERS! This is the name that appears on calls between extensions. Direct to Voicemail short codes and user buttons refer to this name.
b. Full Name – name that appears on a phone when idle.
If making changes to the User Name, you will need to make a corresponding change to the direct to voicemail short code - *extn.number – "#username"
The matching user speed dial button appearing on all other phones should be verified to reflect the name change. Should update automatically to the new username.
If using IMS, change name in the IMS administration tool
Ring Options
Change the sound a ringing phone makes and to differentiate between internal and external calls
Open Manager and receive the system configuration
In Users, go to the Telephony tab
Change Internal or External or both ringing patterns
Merge Configuration
Set Calling Restrictions on Phones
System wide dialing restrictions may be applied on a per-user basis
Open Manager and receive the system configuration
In Users, in the General tab, go to restrictions and use the drop down menu to select the desired restriction
To alter various restrictions, go to the "User Restriction" tab on the left side of the configuration tree
You can override system wide restrictions by setting up User Short Codes
Voicemail On/Off
By default, most users will have Voicemail enabled. If adding a new user, check that voicemail is enabled
Open Manager and receive the system configuration
In Users, go to the Voicemail tab
Check or un-check Voicemail On, as appropriate
Voicemail Ring-Time
This is the amount of time a call rings an extension before going to Voicemail
Open Manager and receive the system configuration
In Users, go to the Telephony tab
Under "No Answer Time (secs)" insert the desired # of seconds the phone will ring before voicemail. If left blank, the system default setting will be used.
Voicemail Reception
This is the extension number that is dialed when "0" is pressed from within a user’s voicemail greeting
Open Manager and receive the system configuration
In Users in the Voicemail tab, set the desired extension number in "voicemail reception"
Call Waiting On/Off
This setting determines if a 2nd call to an extension will go to voicemail (off) or ring for the No Answer Time (on)
Open Manager and receive the system configuration
In Users, go to the Telephony tab
Check or un-check the Call Waiting tab as appropriate
Button Programming
Buttons may be programmed via the Manager application (Users/Digital Telephony) or via certain phone sets & their menu buttons.
1) The following settings are available within the Button Programming/Digital Telephony tab of the Manager program:
·
Button:·
Menu1 to Menu12 can be used to override the default display softkey features accessed by pressing Menu·
Action:·
Dial:·
Group:·
Park:·
User:·
Emulation·
Advanced:·
Appearance:·
Telephone NumberInformation required for this field and the controls available will vary depending on the action displayed in the Action column..
2) Most programming is available via the phones menu button. Refer to the Telephone user guide for details:Files\Telephone Guides\4400_46Files\Telephone Guides\4400_4600_6400_TT9040 Telephones.pdf00_6400_TT9040 Telephones.pdf
DID - Direct Inward Dial
DID's are used to route outside calls to specific Extensions, Hunt Groups or Auto Attendants. Generally, you will be concerned with the last 3-4 digits of the phone number - and take these digits and "route" them to their destination.
When your phone company provides you voice service over PRI, it is common for them to sell you DID's in blocks of 20 numbers (20/40/60/80/etc). Usually these numbers comprise a range, such as 312-256-6500 through 6519 (a range of 20 DID's). This range of numbers is yours to allocate as needed - most commonly, each extension will receive a specific DID.
It is likely that at some point you migrated from non-digital service (traditional, analog trunks) to your current PRI provisioning. If your "published" number is not part of your DID range, do not despair - the last several digits (again, generally the last 3-4 digits) of that number will be "sent" by the telco to you - allowing you to route this number as needed.
With IP Office, routing of DID's to the desired destination is very easy. There are two places to accomplish this - MSN Configuration, and Incoming Call Routes - both found in the IP Office Manager application. Usually, MSN Configuration is used when setting up new DID routing, while Incoming Call Routes is used to change or enhance DID numbers that are already in place.
MSN Configuration Routing the phone number 608-
In Manager, go to Tools and MSN Configuration on the top toolbar.
Maximum Voicemail Message Length
DEFAULT IS 2 MINUTES/120 SECONDS
To change this setting: Open Voicemail Pro Client – Administration > Preferences > General – change Max. Message Time (secs.)
Voicemail Documents
Voicemail User Guide: Files/Voicemail/Intuity Mailbox User Guide.pdf
Voicemail Cheat Sheet: Files/Voicemail/Intuity Quick Guide.pdf
Phone Manager/TAPI
Phone Manager is used to take and make calls on your computer. TAPI allows you to dial phone numbers via your Outlook contacts.
Loading Software: Files\Phone Manager\Phone Manager & TAPI Installation Worksheet.xls
a. Insert the IP Office User Suite CD
b. Options to be installed are Phone Manager and TAPI
c. If modifying an install (eg. Phone Manager already installed, and installing TAPI), make sure to include the already installed software when choosing the programs to install
Configuring Phone Manager
d. Choose File/PBX
e. Select User Name
f. Enter Password (often, no password is set. To indicate a password, open Manager, pull the configuration, and go to the user field. On the first, "user" screen, set and confirm password.)
g. Click OK. Title bar should populate with the Phone Manager version and the user name.
h. For more information, refer to this document: Files\Phone Manager\Phone Manager Installation.pdf
Configuring TAPI
i. Open Control Panel – Phone and Modems – Advanced Tab
j. Delete the Microsoft TAPI and H.323 entries
k. Edit the Avaya TAPI entry
i. Enter extension number
ii. Enter user name
iii. Enter password if applicable
iv. Return to Phone and Modems
l. Edit the "My Location" Dialing Rules
i. Ensure that 9 is entered as a prefix for local and long distance calls
ii. Save and exit control panel
iii. Reboot Computer
m. Open Outlook/Contacts
i. Right click on a contact and choose "Call Contact"
ii. Choose Dialing Options
iii. In "Connect Using Line" – choose the proper extension
iv. Say OK, and choose "Start Call"
Phone Manager Documents
Phone Manager User Guide: Files/Phone Manager/Phone Manager User Guide.pdf
Phone Manager Administration: Files/Phone Manager/Phone Manager Installation.pdf
Phone Manager Notes: Files/Phone Manager/Phone Manager Notes.pdf
Phone Manager Skins: Files/Phone Manager/Loading and Creating Skins.pdf
Soft Console Documents
Soft Console User Guide: Files/Soft Console/Soft Console User Guide.pdf
Soft Console Administration: Files/Soft Console/Soft Console Administration.pdf
IMS for each user must be configured in two locations:
Manager – User/Voicemail tab – enter appropriate email address (note that Voicemail Email reading DOES NOT need to be checked – that is for TTS)
IMS Administration Tool
See IMS for further documentation
IMS client software must be loaded on each user’s PC: IMS\IMS Client Install.htm
Manager – User/Voicemail tab – enter appropriate email address
Tick the "Voicemail Email Reading" box
See TTS for more information
Web Sites
·
Avaya Learning Center (Avaya University): http://www.avaya-learning.com·
Avaya IP Office Knowledge Base·
Avaya UPS Calculator: http://ups.avayaups.com/AC_01.asp·
Community for Avaya Users: www.aucommunity.com
Independent Forums
A number of third-party web sites and forums exist that discuss IP Office. These can act as useful source of information about how the IP Office is used. Some of these forums require you to be a member and to register.
These are not official Avaya forums and content is not monitored or sanction by Avaya.
·
Yahoo Groups: groups.yahoo.com/group/ipoffice·
Tek-Tips: www.tek-tips.com·
Lycos Forum: members.lycos.co.uk/ipoffice·
PBX Tech: www.pbxtech.info/forumdisplay.php?f=8·
Total Worxs: ftp://ftp.totalworx.com/avaya